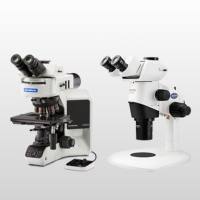
Use of Light Microscope--光学显微镜的使用
互联网
1065
- Each time the microscope is to be used it should be set up correctly to give a good image. Most often users forget to adjust the iris diaphragm and focus the condenser to give its optimum performance, this could result in objects in the preparation being undetected.
- There are many microscope set up procedures for specific functionality but the most versatile for general use is ‘Critical Illumination’ as detailed below.
- Examine the microscope and identify the parts as siting of some controls may vary and some have ‘Fixed’ or specialised condensers.
- Ensure the light intensity control is set to low, turn on the light and increase the brightness to give a white light output.
- Raise the substage condenser fully and open the iris diaphragm fully.
- Rotate the nosepiece to the lowest power objective (x4).
- Rack the stage down using the coarse adjustment control and place the specimen slide on the stage using the retaining mechanism to hold in place.
- While looking carefully rack the stage up close to the objective lens (do not rack the lens into the slide; this cannot normally occur when a low power objective is selected).
- Set the eye pieces to the correct width for your eyes so you can look down both together comfortably.
- Focus the Microscope.
- Look down the eyepieces with both eyes open and slowly lower the stage to bring the specimen into focus, (use the coarse adjustment control initially and then the fine). Slight movement of the specimen while focusing by using the mechanical stage controls may aid you to find the object. If the image is not sharp focus adjustment of the eyepieces may be necessary. If one eyepiece is fixed and one adjustable, close the eye over the adjustable one. Now focus using the fine control until a sharp image is obtained, (if you cannot achieve this ask for assistance as the problem may lie elsewhere). Now open the other eye (keep both open) and using the adjustment on the eyepiece itself rotate to obtain a sharp image.
- Focus the Condenser.
- The condenser should be fully raised to start with. Rotate the nose piece to select the x10 objective and check the focus using fine adjustment. Position the point of a pencil into the middle of the light source over the lamp housing. Using the condenser control, slowly rack it down until the outline image of the pencil becomes sharp and crisp, (this is the ‘Critical’ point for the condenser for optimum performance from where the technique derives it’s name). Note this must be done only after a specimen has been focused on the stage.
- Set the Iris Diaphragm.
- When the iris diaphragm is fully open the image is flooded with light and definition is lost due to ‘white-out’. As the diaphragm is closed controlling the amount of light passing through the condenser the image is darkened and outlines appear thickened and defined as more contrast is achieved. Remove one eyepiece and place safely to one side. Close the diaphragm down ,then open slowly until you achieve a dark ring blanking off about 1/5th of the original field of view to give a ‘bicycle tyre’ effect. The correct amount of light should thus be obtained.
- Examine the specimen, moving it by means of the mechanical stage controls. No further adjustment to the condenser or iris diaphragm is usually necessary to view other slides of the same type/density at low power. The Vernier scale readings may be used to identify and re-locate a point of interest on a slide provided it is a ‘mounted’ preparation and the slide is placed on the stage in the same orientation, i.e. well labeled.
上一篇:Fluorescence Mounting Medium (Antifade) 下一篇:Sterile Technique--无菌操作(细菌培养)


